To get your WhatsApp chatbot up and running, we have to complete a few steps over at Facebook. Unfortunately it's somewhat more involved than the Telegram chatbot, but take your time reading through this and follow the steps carefully:
- Go to https://developers.facebook.com/apps and press "Create App". It is recommended to create a business profile first and connect it to the app it when asked.
- Select "Other" under "Use Case" section:

- Select type: "Business":
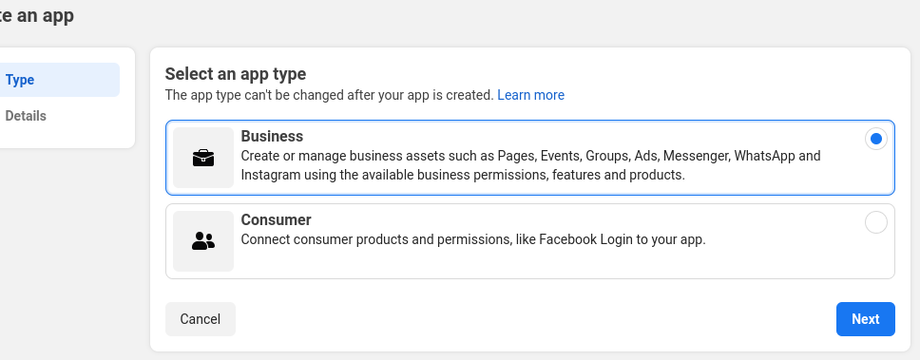
- Fill in your business details
- Enter your Facebook password when prompted and the app will be created.
- Now click on the newly created app - it will appear in the list.
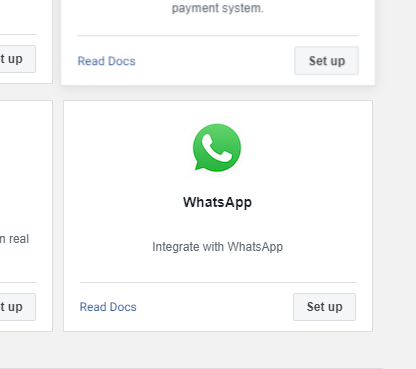
- Scroll down to "Add product" and add WhatsApp
- If you need to create a Business Facebook account, do so when prompted, otherwise select your Facebook Business page from the drop down.
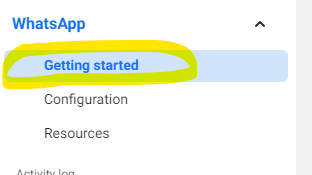
- You will now be at the "Quickstart" WhatsApp page.
- Scroll down to "Webhooks" and tap "Configure Webhooks".
- Click "Edit" and enter https://www.2ndnumber.tel/wacb.php in the "Callback URL" field, and HgstebGSte56437JShtr in the "Verify token" field. Tap "Verify and Save"
- Tap "Manage" button next to "Webhook fields" and press the "Subscribe" button next to the "messages" row

- Now tap "Quickstart" under the "WhatsApp" option:
Then tap "Add Phone Number". Complete the "WhatsApp Business Profile" form as you see fit and tap "Next". Now, type your 2ndNumber phone number and select either SMS or voice verification. Either is fine. - Your number will now appear but it will be "pending review" or "unavailable". This can take up to an hour. Once it is no longer pending review we need to go back to: https://developers.facebook.com/apps and then select our app again.
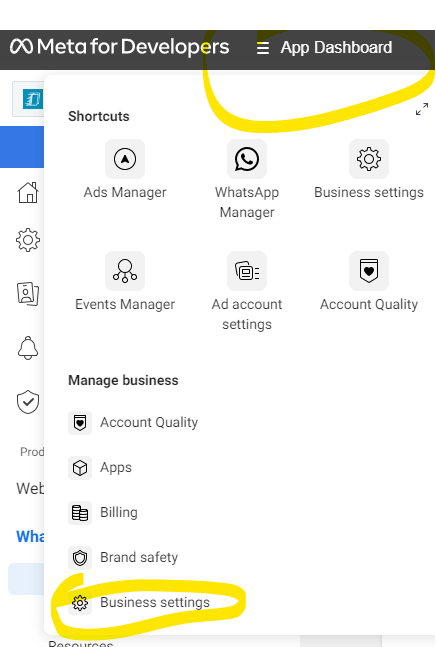
- Now tap "App Dashboard" -> "Business Settings"
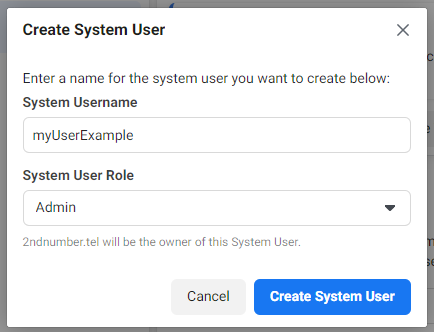
- On the left menu, select "Users" > "System Users". Click the Add button and you will get a pop-up window. Enter the user name and choose "admin" as the system user role.
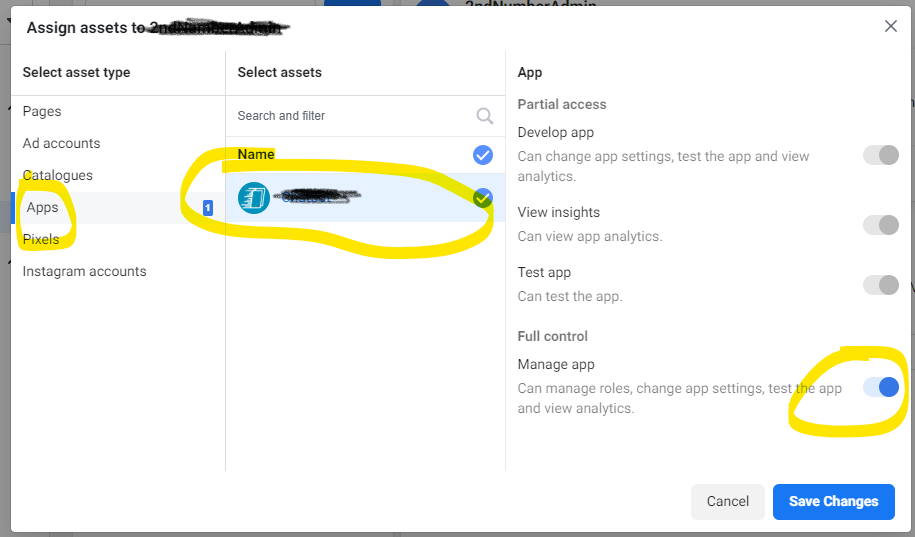
- Now, you'll see the new user created. Click on the "Add Assets". Choose "App" > Select your app > Select "Full control" option then save changes.
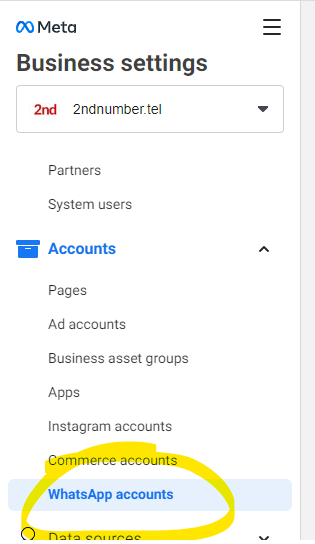
- Now tap "WhatsApp Accounts" from the left side menu
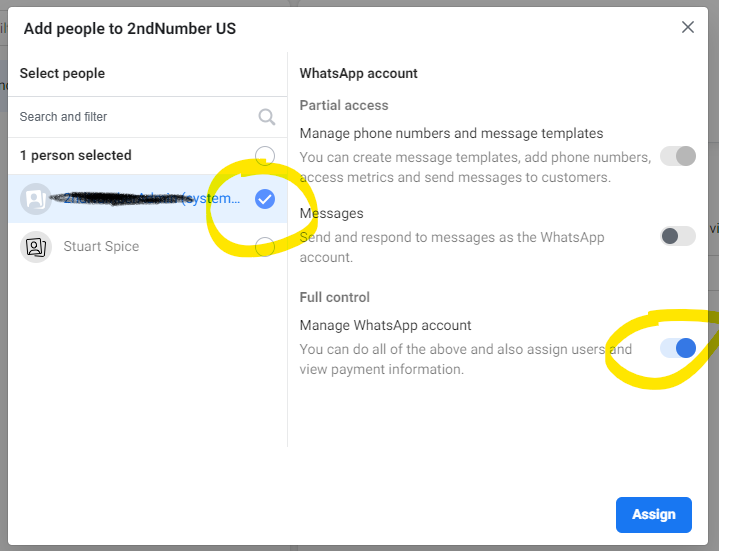
- Press the "Add People" button, select the user you just created, and select "Full Control"
- Now go back to "System Users" on the left hand menu and tap "Generate New Token"
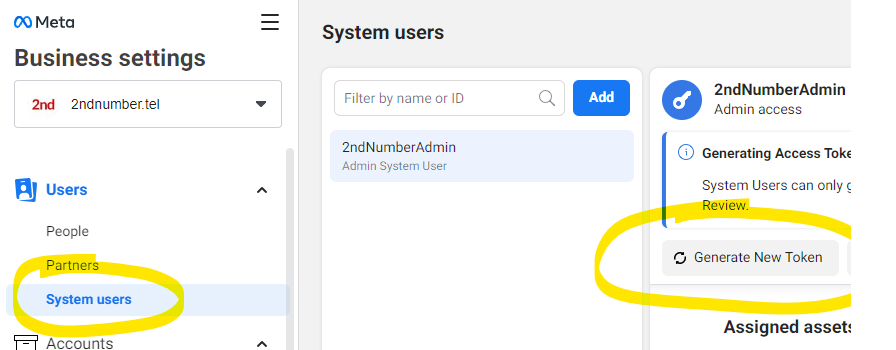
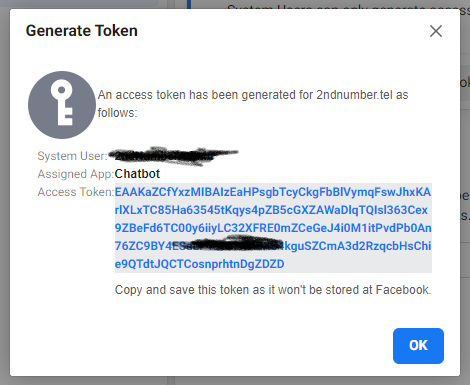
- Select your app we created earlier from the list, and scroll down to tick "whatsapp_business_messaging" and "whatsapp_business_management" and then tap "Generate token". You'll be given a token on screen that you MUST copy and paste somewhere safely as it is not stored anywhere. We will need it in 2ndNumber.
- Now go back to https://developers.facebook.com/apps - Select your app > Scroll to "WhatsApp", click the down arrow > "API Setup". Make a note of your phone number ID
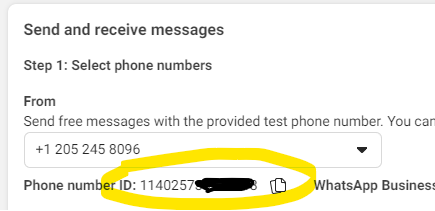
- Phew! We're done with Facebook. Now go back to your 2ndNumber WhatsApp Chatbot and tap "Set Bot Details". Enter the Phone ID in step 21 into the first box and the token from step 20 in the second box.
NOTE: The phone ID is NOT the phone number, it is the special ID you got from step 21.

- And we're done! You just need to build your chatbot now by following the instructions on the left hand side. If you get stuck, do let us know.


